Showing posts with label Halloween. Show all posts
Thursday, October 17, 2013

Halloween Graphing Game


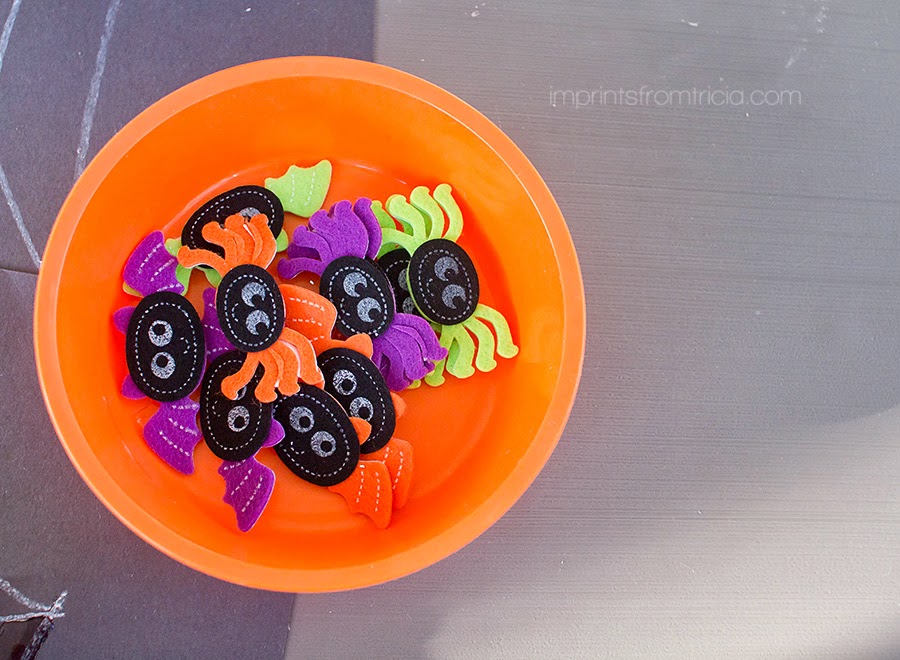
Here's a fun and educational way to use those Halloween foam shape stickers that you can get in the dollar aisles or at craft stores around Halloween time.

I used white construction paper to make a graph and placed a different Halloween sticker in each column. If you want the graph to be more durable I would suggest using tag board paper instead but for our needs the construction paper worked fine.


Next we used index cards cut up into small rectangles and placed one sticker on each card. I chose to put the stickers on cards as opposed to having my girls stick on the stickers to the graph so that we can use this activity/game multiple times.


I also made cards with the terms Most, Least, Same so the girls can use these comparative words once they complete the graph.


Before the girls started the graph I grouped the stickers cards together so that once they were done graphing they would each have a column that had the most, least and two that were the same.

Again, what's great about having the stickers on cards is that each time you play you can group them together differently so that the outcome is never the same, making it more challenging and keeping it interesting for the kids.

Now the fun part, graphing time!


Once they were done I asked them to count each category and write the corresponding number under each column. This is a great way to include writing and number skills into this activity!


Finally, I asked them to tell me which column had the most, least and which two were the same. They then placed the comparative word under the corresponding column.


There you have a Halloween graphing game using not only graphing skills but counting, number writing, and comparison words as well!  Now you can switch it up and do it over again and again!

If you like what you see here please join us on Facebook here: Imprints From Tricia on Facebook
Monday, October 7, 2013

Fine Motor Fun: Pipe Cleaner Spider Web


I surprised the girls with this fun little set up after quiet time today. 


What I love about this Halloween project is that not only is it a cute little craft but it's a great way to practice those fine motor skills. 

The materials used: 
- Silver and white pipe cleaners cut up into various lengths. 
- Glue
- Black construction paper
-White crayons 
- Foam spider stickers 


I drew the spider web shape onto the black paper ahead of time. When the girls arrived I demonstrated how to line up the pipe cleaners to the spider web and glue them on. I also explained that there are various sizes to fit the small, medium and large lines. 

My 3 year old enjoyed lining up the outside of the spider web. 


My 5 year old started off lining the outside and then quickly made her way to the inside as well. 


It takes some strength to press down on the pipe cleaners and hold them in place with the glue. The girls didn't know it but they were hard at work practicing fine motor skills! 

I let them tell me when they were done and since it took awhile to hold each pipe cleaner in place neither of them filled up the entire web or even came close. We like to encourage the process NOT the product so that was just fine! :) 

Next they placed these cute adorable spider foam stickers (purchased from Michaels) on their spider webs and they were done. 

*We all know that not everything turns out as planned and even with lots of glue some of the pipe cleaners were not sticking. I waited until they were dry and the ones that didn't stick I placed a small piece of clear scotch tape over them and that seemed to do the trick. Upon reflection this probably would work better with yarn. 


There you have our fine motor fun with a Halloween spider web!

If you like what you see here won't you please join us on FB here: Imprints From Tricia on Facebook


Monday, September 30, 2013

Halloween Themed Breakfast


One of my very first posts was about a Halloween treat I used to make with my students when I taught Preschool called Ghost Toast. Once my own kids turned old enough I started to make it with them around Halloween.

Today we are reviving the Ghost Toast and combining it with Witch's Brew to complete a fun Halloween Themed Breakfast for the kiddos!


Ghost Toast- To make the Ghost Toast you will need bread, white cheese (we used mozzarella), raisins, a toaster oven and a ghost cookie cutter.


My 3 year old placed the cheese on the bread, put the cookie cutter on top and pressed down.


 I helped her peel off the sides so all that was remaining was the ghost shape. 


We then placed it in the toaster oven to toast and when it was done she used the raisins to make the eyes. 


Finally it was time to enjoy it! 


We also made Witch's Brew to complete the meal. 

Witch's Brew- You will need 1 cup of milk, 1/2 cup of orange juice, Halloween sprinkles and whipped cream. *optional- cute Halloween cup and fancy orange straws! 


Simple combine the orange juice and milk add the whip cream to taste and add the sprinkles on top. 

Okay, I know what you're thinking: the thought of orange juice and milk together sounds utterly distasteful! Yep, I thought the same thing years ago but when I tried it for the first time back in my teaching days I was nicely surprised. It actually tastes similar to a dreamsicle. The kids never seemed to mind and just enjoyed the idea that they were drinking Witch's Brew. 


Our fairly easy but super festive Halloween breakfast was a big hit in our house! Hope your kiddos enjoy it as well!!


If you like what you see here please join us on Facebook here: Imprints From Tricia on Facebook


Thursday, October 27, 2011

Ghost Toast

Here's a quick little Halloween treat that the kids can help make.

Materials - slice of white cheese (we used mozzarella), slice of bread, raisins, ghost cookie cutter, toaster oven

Mallory placed the cheese on her bread
IMG_4306

I helped her place the cookie cutter over the cheese and bread and cut out the ghost shape.
She placed the raisins for the eyes.

IMG_4307

Mallory also decided she wanted a nose, the one on the left is Jillian's (She helped a little but I did most of it for her since she's only 19 months).
IMG_4309

We placed it in the toaster oven and watched the cheese melt. Mallory noticed it looked different after we brought it out of the oven. So I asked open ended questions like "Why do you think it looks different?", "What do you think happened to it while it was in the oven?"etc.
IMG_4310

The best part was eating it! YUM!
IMG_4311
Monday, October 17, 2011

a Halloween Story Extension

When I used to teach preschool I LOVED reading stories and doing extension activities related to the book; acting it out, making an art project, making a recipe, etc.

This is one of my favorite Halloween books for early childhood.


The Little Old Lady Who Was Not Afraid Of Anything by Linda Williams.

You can find it here on Amazon: The Little Old Lady Who Was Not Afraid Of Anything

The book is full of repetition which the kids love and it makes for a great story extension of "acting out" as you read aloud.

In the story the little old lady comes across two shoes that go clomp clomp, one pair of pants that go wiggle wiggle, one hat that goes nod nod, one pair of gloves that go clap clap and one scary pumpkin head that go Boo Boo.

The objects and sounds/actions they make are repeated throughout the story.  I made a sign for each of them, drew a picture and wrote the corresponding phrase under each one.  

Each participant was assigned a card- in our case we had grandma and grandpa help out to fill all the spots.

My husband read the story out loud.

IMG_2725


Mallory was the shirt so when my husband read "and the shirt went... Mallory then held her sign up and said "shake shake!"....and so on with each participant and their part.

IMG_2733


Grandma was the hat that went nod nod.

IMG_2734


Papa was the shoes that went clomp, clomp.

IMG_2738


Daddy was also the pants that went wiggle wiggle and we are all together the big scary pumpkin head that went boo boo.

I can't even begin to describe how much Mallory enjoyed this simple story extension. I had already had the signs made from my years teaching but it's so easy to put together some for yourself.

What a great way to celebrate books by providing an all family fun activity!

Halloween Cookie Cutter Painting

Clearly this not ground breaking- it's been done before, many times!   But it's simple, and fun and great for a wide variety of ages, as you will see in the photos my 18 month old and my 3 year old enjoyed it!  It's messy but the girls loved it!!

Materials


A variety of Halloween cookie cutters ( we used two different kinds)
orange and black paint
Paper ( we used glossy finger painting paper)

Dip the cookie cutters in the paint and make prints all over the paper.  With children 3 and under this will inevitable turn into finger paint!

This obviously could be adapted to all sorts of holidays, Easter cookie cutters with pastel colors, Christmas cookie cutters with green and red etc..

IMG_2709


IMG_2689


IMG_2691


IMG_2698


IMG_2704


Note to self: put down newspaper next time- it wasn't too bad though- the paint easily came off!