Showing posts with label Art. Show all posts
Friday, December 13, 2013

Glitter Christmas Card Ornaments

I'm so excited to be participating in the 20 Days of Kid-Made Ornaments series hosted by  Mama Miss.


With Christmas only a couple of weeks away we have been spending lots of time creating fun holiday crafts! Today I'd like to share our glitter Christmas card ornaments. This is a great way to up-cycle those old or unused Christmas cards!


I had a stash of unused Christmas cards that was a variety pack so it had various card themes: a manger scene, Christmas decorated house, Christmas tree, etc.


First I cut around the cards to get rid of any empty space and punched a hole at the top. I did this ahead of time because my girls are young and it would be difficult for them to cut evenly but it would be a great task for an older child to help with.


Next is the fun glitter and glue part! This can get a bit messy especially when you have a glitter happy 3 year old helping out, but the girls loved creating with the glitter!


The girls used q-tips to spread glue wherever they wanted the glitter to show on the card. Once they were done with the glue they added the colored glitter to the ornament.


The more glitter the better so it's okay if they get a little crazy with the glitter! :) After they applied the glitter we shook off the access glitter and let them dry.

Once they dried we added the ribbon through the punched hole and there we had our new Christmas Glittery Ornaments!


They look great on the tree and not too difficult to make if you don't mind a little bit of a glittery mess!

If you like what you see here please join us on Facebook here: Imprints From Tricia on Facebook

For more ornament inspiration be sure to check out the Kid-Made Christmas Ornament Pinterest Board here: Kid-Made Ornament Pinterest Board

If you have a kid-made ornament you would like to share be sure to stop by this link up over at Mama Miss, check out all the crafty ornament ideas and add your own!

Oh and one more thing: I'm sharing this day in the kid-made ornament series with these fabulous ladies:

Mama Papa Bubba

Me Me Tales

So head on over to their blogs for more ornament fun!


Friday, December 6, 2013

Button Christmas Ornaments


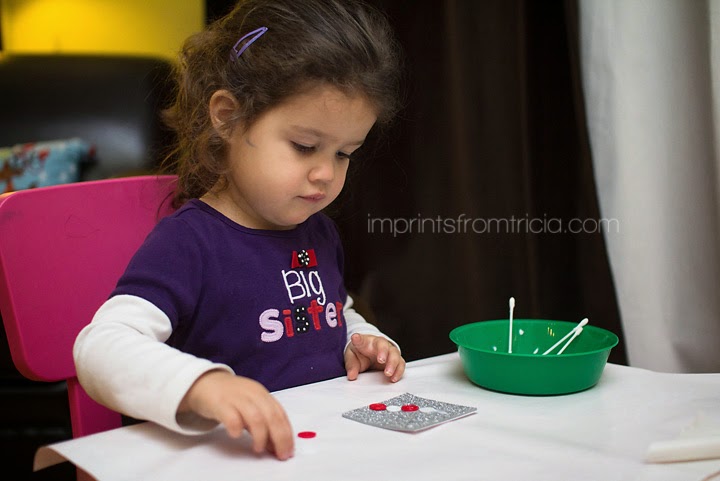
We had so much fun creating these simple button Christmas ornaments. All you need are sparkle foam sticker paper (I found mine at JoAnn Fabrics), ribbon stickers, red, white, and green buttons, glue, index cards, ribbon and a hole puncher.


We decided to make the candy canes and wreaths but you could easily make other Holiday symbols as well.

Ahead of time, I cut up the index cards and foam sticker paper into small squares and then drew the candy cane and wreath shapes onto the foam sheets. That way my girls could easily follow the pattern and glue the buttons in each shape.


Gluing those little buttons is great fine motor skill practice for little hands! I also like to use q-tips and glue in a bowl. It seems to make it easier for young children to spread the glue onto projects.

Once they were done gluing the buttons and it dried I punched a hole at the top and tied a ribbon through. Now they are all ready to to display on our Christmas Tree!


These would also be a great gift for kids to make for friends and family! Another idea is to add a magnet sticker to the back and use them for  holiday magnets!

My girls liked the candy cane better but I was partial to wreath! Do you have a favorite?


If you like what you see here please join us on Facebook here: Imprints From Tricia on Facebook


Wednesday, November 27, 2013

Thanksgiving Placemat For Kids To Make


When I hosted Thanksgiving dinner a couple of years ago I had so much fun coming up with ways to decorate the kids table.  Here's a simple way to get the kids involved in personalizing their very own spot at the table. Have them make their own Thanksgiving placemats!

All you need are oil pastels (crayons or markers will work too), orange construction paper, printed out sheets of paper that say We Give Thanks, glue, Thanksgiving stickers and contact paper.

I played around with my various fonts on the computer and chose a bold puffy font to type the words We Give Thanks. You want something that is fairly chunky so the kids have space to color it in.


The girls glued on the We Give Thanks paper to the orange construction paper and then using fall colored oil pastels they colored in the words. I used oil pastels because they tend to be a bit brighter but crayons or markers will work too.

We had been talking about what it means to be thankful and grateful so we continued our discussion of what it means to give thanks.


After they were done coloring in the words I gave them some foam Thanksgiving stickers and they decorated along the sides of the paper with them. On a side note peeling off the backs of the foam stickers is great fine motor skill practice!


Once they were done decorating we covered the placemat with contact paper and then they were complete and ready to be displayed!


This is a perfectly simple activity for the kids to do to prepare for Thanksgiving! You could even have the materials ready and use this as a little project for your guest children to do on Thanksgiving day!

If you like what you see here please join us on Facebook here: Imprints From Tricia on Facebook
Monday, October 7, 2013

Fine Motor Fun: Pipe Cleaner Spider Web


I surprised the girls with this fun little set up after quiet time today. 


What I love about this Halloween project is that not only is it a cute little craft but it's a great way to practice those fine motor skills. 

The materials used: 
- Silver and white pipe cleaners cut up into various lengths. 
- Glue
- Black construction paper
-White crayons 
- Foam spider stickers 


I drew the spider web shape onto the black paper ahead of time. When the girls arrived I demonstrated how to line up the pipe cleaners to the spider web and glue them on. I also explained that there are various sizes to fit the small, medium and large lines. 

My 3 year old enjoyed lining up the outside of the spider web. 


My 5 year old started off lining the outside and then quickly made her way to the inside as well. 


It takes some strength to press down on the pipe cleaners and hold them in place with the glue. The girls didn't know it but they were hard at work practicing fine motor skills! 

I let them tell me when they were done and since it took awhile to hold each pipe cleaner in place neither of them filled up the entire web or even came close. We like to encourage the process NOT the product so that was just fine! :) 

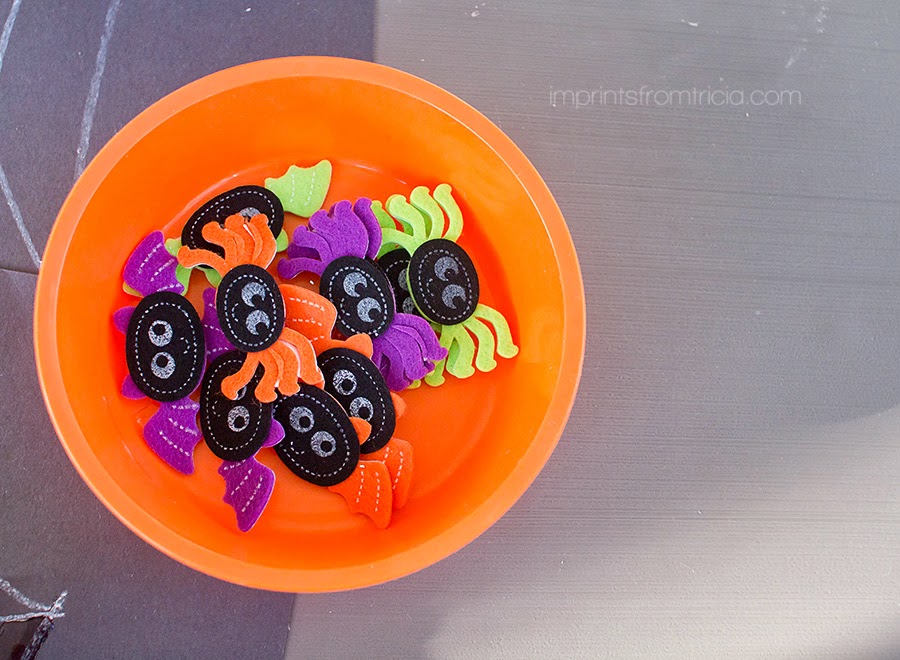
Next they placed these cute adorable spider foam stickers (purchased from Michaels) on their spider webs and they were done. 

*We all know that not everything turns out as planned and even with lots of glue some of the pipe cleaners were not sticking. I waited until they were dry and the ones that didn't stick I placed a small piece of clear scotch tape over them and that seemed to do the trick. Upon reflection this probably would work better with yarn. 


There you have our fine motor fun with a Halloween spider web!

If you like what you see here won't you please join us on FB here: Imprints From Tricia on Facebook


Monday, September 23, 2013

Fall Picture Display Using Fall Paintings


The leaves are falling and starting to change colors and we've had some beautiful days in our neck of the woods. Fall is my absolute favorite season and because of that I love decorating our home for the Fall. If you have been hanging out on my blog for awhile now you will also know that I love photography. I have all these cute fall photos of my kids from previous years that simply sit on my computer. So I decided I needed to figure out a way to display them with my Fall decor.

 I wanted to somehow incorporate the girls fall art work with the Fall photos. With a little brainstorming and a walk through Michael's Craft Store I came up with our Fall Painting Picture Display. We have been reading books and talking a lot about Fall and all the changes that come with it. Ahead of time I set up an invitation to paint using Fall colors and canvases.


My 5 year old immediately started to experiment with different strokes. She did circles and then ended up with lines.


My 3 year old seemed to focus more on the specific colors, announcing every time she switched colors.


I did encourage them to cover up all the white spots since I knew this would be used as the photo back drop.


Once they were done and the paint dried I attached some Fall colored ribbon around the top of the paintings and tapped it to the back. I also used mini clothing pins and attached those to the top of the ribbon.


Ahead of time I had printed my favorite Fall photos of the girls from last year.  I wanted to be able to change out the photos year after year so the clothing pins were added to be able to display the photo without having to secure/tape it down.

Now its easy peasy to change it and every year I can display the previous year's favorites!


The girls loved paining on the canvas and once they were done it was super easy to complete!

The final products looked great when placed together with some of our Fall decor!!


There you have it! Our Fall canvas painting picture display!

If you like what you see here please join us on Facebook here: Imprints From Tricia on Facebook


Wednesday, August 14, 2013

Painting Picnic


I had the pleasure of being a guest poster on Mess For Less last month and was happy to share my painting picnic over there. You can find the original post here: Painting Picnic- Mess For Less 


Summer is winding down and we are trying to spend as much time as we can outside!  Here is a fun way to take the painting outdoors! 


I told the girls we were going to go on a painting picnic and I gathered the items needed ahead of time.
We packed the following items in our picnic basket, clip boards, white paper, various sized brushes, paints, container for the paint, blanket, apples and oranges.


I thought it would be fun to bring along fruit for two reasons: To munch on for our snack (of course) and to use as still life art for the girls to paint. This could be a fun way to introduce still life painting with young kids!

To keep it simple we chose to go on our picnic in our own backyard but of course this activity would be great to do at your local park, forest preserve, ocean side (If you you should be so lucky to live near the ocean).

We spread the blanket out and I set up the activity. We talked about the fruit and the meaning of still life painting and I explained that the fruit was there so they could make their own version of still life paining. I didn't want to limit them so I stressed that they could do the still life painting or paint whatever their hearts desired.

My 4 year old chose to paint the apple and orange and my 3 year old said "Mommy, I'm not painting anything, I'm just painting." Both were perfectly acceptable in my eyes! It's about the experience and the process not the final product!!


Can I just tell what a hit this little picnic became! Sometimes I have these grand plans of how an activity is going to go and it fails to meet my expectations. Either the girls are crabby or I thought they would enjoy it but they are bored after awhile. This however was so fun for all of us!

You can just see the concentration in their little faces! We were surrounded by nature and it was calm and peaceful!


We even had an unexpected visitor join us for our picnic fun. My three year old loved letting this ladybug crawl on her arm.


My little artists built up an appetite and the very best part was eating the still life- the apples and oranges when they were done with their work.


That completed our painting picnic!  This will definitely be on our list to do again soon!

If you like what you see here please join me on Facebook here: Imprints from Tricia on Facebook